Cinematography School
Theory, technique & visual craft for the independent filmmaker.
CHAPTER THREE
Exposure & the Exposure Triangle
Correct exposure is not about making things bright. It is about placing tones.
ISO, Shutter & Aperture
Exposure in motion picture work is governed by three variables: ISO (sensor sensitivity), shutter speed (or shutter angle), and aperture. Together they form the exposure triangle.
ISO determines how sensitive the sensor is to light. A lower ISO (100–400) produces a cleaner image with less noise but requires more light. A higher ISO (1600–6400+) amplifies the signal, allowing you to shoot in darker conditions, but introduces grain and noise. Every camera has a native or base ISO where it produces the cleanest image with the widest dynamic range. Shooting at or near base ISO is ideal whenever possible.
Shutter speed in filmmaking follows the 180-degree shutter rule, a convention inherited from film cameras where the rotary shutter was literally a half-circle. The rule states that your shutter speed should be approximately double your frame rate. This produces a natural amount of motion blur per frame that the human eye finds pleasing and cinematic.
When you need to maintain the 180-degree shutter rule and your base ISO in bright conditions, but your aperture is already where you want it creatively, ND (neutral density) filters are the solution. ND filters reduce the amount of light entering the lens without affecting color. They are the cinematographer’s sunglasses — essential for shooting wide open in daylight.
180° shutter rule: shutter speed = 2× frame rate. 24fps → 1/48s (use 1/50s). 30fps → 1/60s. 60fps → 1/120s.
Exposure Tools
Your eyes adapt to brightness changes; the camera does not. Reliable exposure requires objective measurement tools, not just looking at the monitor.
The Waveform Monitor displays brightness values across the horizontal axis of your image. The bottom of the waveform represents black (0%), the top represents white (100%). Properly exposed skin tones typically sit between 40–70% on the waveform depending on the subject’s complexion. Highlights clipping at 100% or shadows crushing at 0% mean you are losing information that cannot be recovered.
False Color is an overlay that maps brightness levels to specific colors. Typically, yellow indicates proper skin tone exposure, red indicates overexposure or clipping, and blue/purple indicates underexposure. The exact color mapping varies by camera manufacturer, so learn your specific camera’s false color scale.
These tools are essential when shooting in Log or Raw, where the image on the monitor looks flat and washed out by design. Without scopes, you are guessing — and guessing in Log means you will either clip highlights or crush shadows without knowing it until post-production, when it is too late.
Log & Raw
Log (logarithmic) gamma curves are a way of encoding sensor data that preserves the maximum dynamic range in the recorded file. Instead of mapping light linearly (where most of the data is allocated to the brightest areas), Log redistributes the data so that shadow detail and highlight detail both get adequate information.
The trade-off is that Log footage looks flat, gray, and desaturated straight out of the camera. It requires color grading in post to look correct. This is by design: the flat image is a canvas with maximum flexibility. You can push shadows, pull highlights, and shape the look in ways that would cause banding or noise in standard Rec. 709 footage.
Raw recording goes a step further. Instead of baking any processing into the file, Raw stores the actual data from the sensor with minimal processing. This gives you control over white balance, ISO, and color science in post, as if you were making those decisions on set. Raw files are large — often 5–10 times the size of compressed codecs — and require more processing power to edit. But for maximum quality and flexibility, Raw is the gold standard.
For independent filmmakers: shoot Log if your camera supports it and you have a grading workflow. If you are delivering quickly with minimal post, shoot in a standard color profile and get it right in camera. Shooting Log without grading results in flat, ugly footage — worse than if you had shot standard.
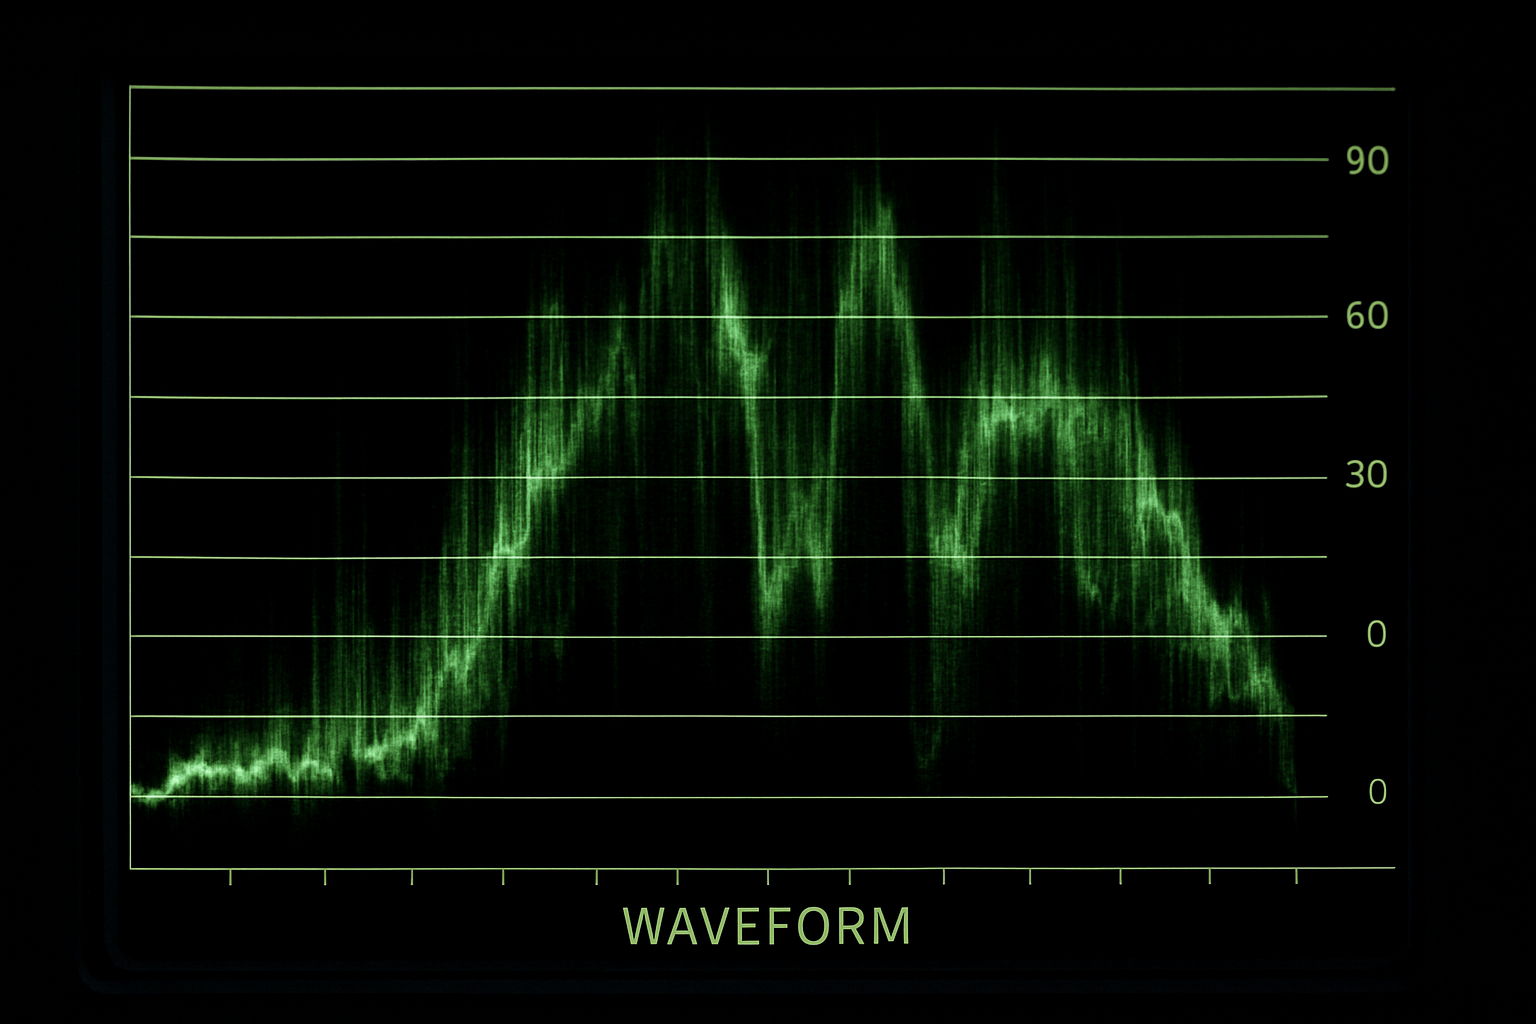
Waveform monitor — luminance plotted left to right
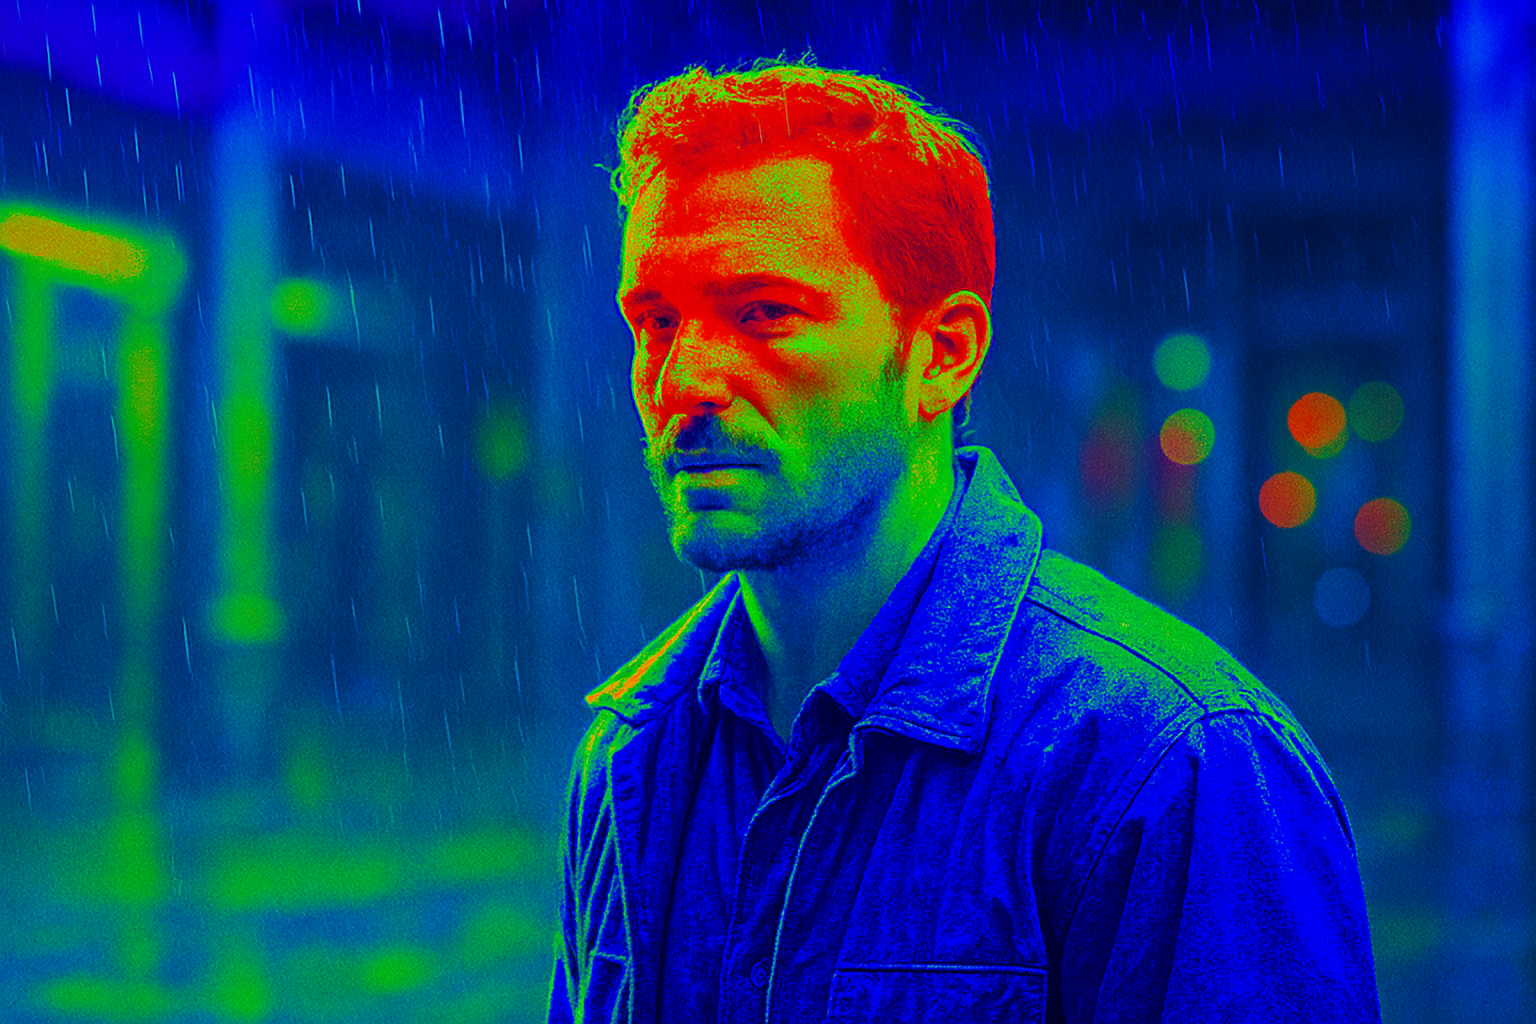
False color — red is overexposed, green is middle grey